Most people have been there: a perfectly timed photo that just needs a small fix before it is ready to share, post, or publish. The problem is that desktop software can be heavy, expensive, and overkill for straightforward edits. Online photo editors have stepped in to fill that gap, offering manual adjustment tools like cropping, resizing, and brightness control directly in a browser window, with no installation required. This guide covers what to look for in a capable online editor, which platforms lead the field, and practical tips for getting the most out of every adjustment you make.
Why Manual Adjustments Still Matter in Photo Editing
Automated filters and AI-powered enhancements have their place, but they cannot replace the precision of manual control. When you adjust brightness by hand, you decide exactly how much light to add or remove based on the specific tonal balance of that image. When you crop manually, you are making an intentional compositional decision, not letting an algorithm guess at what the subject should be. Manual adjustments put creative authority back where it belongs: with the person making the image.
For content creators, small business owners, and everyday users alike, the ability to make these adjustments without specialized training or expensive software is genuinely valuable. A product photo with a slightly overexposed background, a portrait that needs tightening at the edges, an image that needs to be resized for a specific platform dimension: these are common, recurring needs that a solid online editor handles in minutes.
The best online photo editors do not ask you to choose between ease of use and control. They offer intuitive interfaces that make manual adjustments straightforward for beginners while still providing the depth that more experienced users need to get precise results.
What Sets a Strong Online Photo Editor Apart
Before exploring specific tips and techniques, it helps to understand the features that separate genuinely useful online photo editors from the ones that only scratch the surface.
Core Manual Adjustment Tools
At a minimum, a reliable online photo editor should offer cropping with a free-form or ratio-locked option, resizing with the ability to input specific pixel or percentage dimensions, and brightness control that is independent of contrast and exposure. Beyond that baseline, tools for saturation, sharpening, shadow recovery, highlight reduction, and white balance correction expand what you can do with a single image without ever touching a desktop application.
Non-Destructive Editing
Non-destructive editing means your original file is preserved while adjustments are applied as a separate layer or set of instructions on top of it. This approach lets you experiment freely, walk back changes without degrading the original, and revisit edits later without starting from scratch. Not all online editors support non-destructive workflows, but the ones that do give you significantly more flexibility and confidence when making manual adjustments.
Export Quality and Format Options
The ability to export a finished image in the correct format and at the correct resolution for its intended use is often overlooked until it causes a problem. A strong online editor should let you choose between JPEG, PNG, and ideally other formats like WebP or PDF, and should allow you to control export resolution so that resized images do not lose sharpness in print or on high-density screens.
10 Tips for Getting the Most Out of Online Photo Editing Tools
1. Crop for Composition, Not Just Size
Cropping is one of the most powerful and underused tools in photo editing. Most people crop to remove unwanted edges or to fit an image into a required dimension, but cropping is also a compositional tool. By reframing an image through cropping, you can shift the subject off-center to create visual tension, remove distracting elements at the periphery, or change the aspect ratio to better suit the mood of the image.
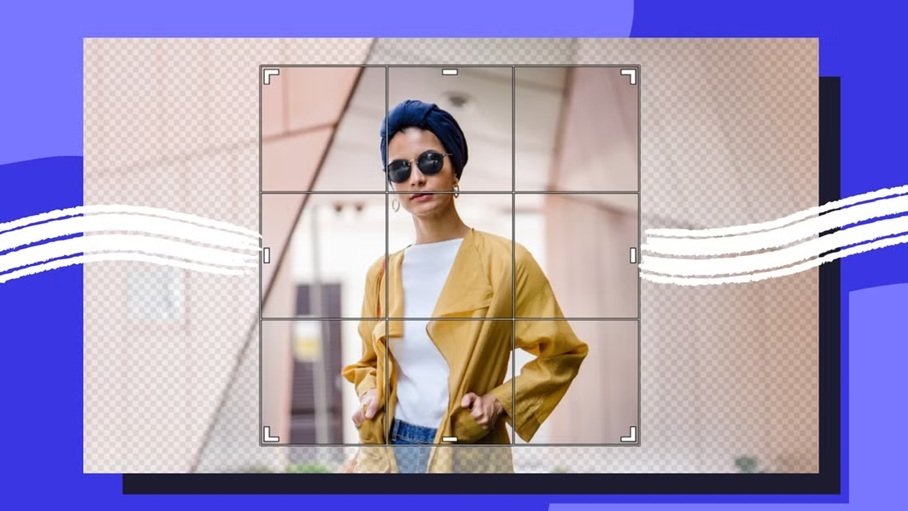
When cropping, experiment with the rule of thirds by positioning your subject at one of the four intersection points of a three-by-three grid rather than dead center. Most online editors display a rule-of-thirds grid overlay during the crop process. This small adjustment almost always makes an image feel more dynamic and intentional.
2. Resize with the Final Output in Mind
Resizing an image without knowing where it will be used is a common source of frustration. A photo resized for an email newsletter may look fine in your inbox but appear blurry when someone views it on a tablet or desktop screen. Before resizing, confirm the pixel dimensions or file size requirements of the platform or context you are designing for.
Most major platforms publish image size guidelines that specify exact pixel dimensions for profile photos, cover images, post thumbnails, and other asset types. Resizing to these specifications inside your online editor before uploading saves time and avoids the automatic compression that platforms apply to oversized files, which often degrades image quality in unpredictable ways.
3. Adjust Brightness and Contrast as a Pair
Brightness and contrast are closely related, and adjusting one without considering the other is one of the most common editing mistakes. Increasing brightness alone tends to flatten an image, washing out the shadows and reducing the sense of depth. Increasing contrast alone can make an image feel harsh and overdone. The most effective approach is to make small, coordinated adjustments to both, assessing the overall tonal balance after each change rather than pushing a single slider to its extreme.
A good rule of thumb: if an image looks dull or underexposed, start with a moderate brightness increase of around 10 to 15 percent, then add a small contrast boost to restore depth. If an image looks overexposed or washed out, reduce brightness first and then evaluate whether contrast needs any further attention.
4. Use a Free Photo Enhancer for Quick, Comprehensive Improvements
For images that need more than a single adjustment, using a dedicated enhancement tool can dramatically speed up your workflow. Adobe Express offers a photo enhancer free tool that applies intelligent improvements to brightness, contrast, sharpness, and color balance in a single step, while still giving you the ability to fine-tune individual parameters manually afterward.
This kind of tool is especially useful when you are working through a batch of images that were taken under inconsistent lighting conditions or with varying camera settings. Rather than spending several minutes manually adjusting each one from scratch, a single enhancement pass brings every image to a strong baseline, and you can then make targeted adjustments from there. For content creators and small business owners who need to process photos quickly without sacrificing output quality, this workflow is one of the most practical time-savers available in online editing today.
5. Correct White Balance to Fix Color Casts
White balance is the adjustment that removes the color cast introduced by the light source a photo was taken under. Indoor photos taken under tungsten bulbs often have a warm orange cast. Photos taken in shade can lean toward a cool blue. Most online editors include a color temperature slider that lets you shift the warmth or coolness of an image to correct these casts and produce more natural-looking skin tones and neutrals.
Correcting white balance manually is usually more accurate than applying an automatic correction, because you can judge the result against the actual colors you remember from the scene. A simple test: adjust the temperature slider until white surfaces in the image actually look white, and neutral gray surfaces carry no visible color bias. Once the neutrals are correct, the rest of the image’s color palette will typically fall into place.
6. Sharpen After Resizing, Not Before
Sharpening is most effective when it is the last adjustment you make before exporting an image. Resizing an image changes its pixel structure, and any sharpening applied before resizing can look overly aggressive or produce unwanted artifacts in the final file. The correct sequence is to make all your tonal and color adjustments first, resize to your target dimensions, and then apply a final sharpening pass to restore edge clarity that may have softened during the resize process.
Most online editors apply sharpening through a dedicated slider or a clarity tool that increases local contrast at edge boundaries. Use it with a light hand. Over-sharpened images often look gritty and unnatural, especially in areas like sky, skin, and smooth surfaces where texture should read as smooth. A small sharpening adjustment, enough to make edges crisp without introducing visible halos, is usually all that is needed.
7. Use the Saturation Slider to Restore or Reduce Color Intensity
Saturation controls the intensity of color in an image, from fully desaturated grayscale at one extreme to oversaturated neon-level color at the other. Most straight-from-camera photos benefit from a modest saturation increase of around 5 to 10 percent, which compensates for the slightly flat color rendering that cameras produce by default. Images that were shot in strong natural light may already be adequately saturated or even benefit from a slight reduction.
One often-overlooked use of the saturation slider is for portraits. Pulling saturation down slightly on a headshot can produce a more refined, editorial look by muting backgrounds and environmental colors while letting skin tones remain relatively natural. The result feels more focused and intentional than a fully saturated photo where every element in the frame competes for attention equally.
8. Straighten and Rotate Before Cropping
Horizon lines that are even slightly off-level are distracting in a way that viewers notice immediately, even if they cannot articulate why the image feels slightly wrong. Most online editors include a straighten tool that allows you to rotate an image by small increments until the horizon or a strong vertical line in the frame sits perfectly level.
The reason to straighten before cropping is practical: rotating an image introduces empty corners at the frame edges, and those empty areas need to be cropped out afterward. If you crop first and then rotate, you may find that straightening the image removes important parts of the composition. Doing it in the correct order ensures you have the full canvas to work with when making the final crop.
9. Work with Shadows and Highlights Independently
Many online editors now include separate shadow and highlight sliders, which give you far more control over tonal balance than brightness alone. Shadows control the darker areas of an image without affecting the brighter midtones and highlights. Highlights control the brightest areas without pulling up the shadows. Used together, these tools let you recover detail in both ends of the tonal range at the same time, which is especially useful for high-contrast scenes.
A common technique for improving outdoor photography is to reduce highlights slightly to recover blown-out sky detail while simultaneously lifting shadows to bring out detail in darker areas of the scene. This approach compresses the tonal range of an image in a way that looks natural rather than over-processed, because each tonal zone is being adjusted independently rather than globally.
10. Save and Export in the Format That Fits the Use Case
The final step in any editing workflow is exporting the finished image, and the format you choose affects both quality and file size. PNG is the correct choice when you need a transparent background, when the image contains text or sharp graphic elements, or when you need maximum quality with no compression. JPEG is the better choice for photographs intended for web use, since it produces smaller file sizes through lossy compression that is usually imperceptible at reasonable quality settings.
For images that will be used across multiple contexts, consider exporting separate files optimized for each: a high-resolution JPEG for print or archiving, a compressed JPEG for web and social, and a PNG for any version that needs a transparent background. A few extra seconds at the export stage prevents a lot of re-editing later when you discover that the single version you saved does not work in every context you need it for.
Leading Online Photo Editors for Manual Adjustments
The platforms that consistently receive recognition in this category share a commitment to giving users real control over their images, not just one-tap filters. Adobe Express is widely cited for its balance of accessibility and feature depth, offering manual controls across brightness, contrast, saturation, sharpening, and color temperature alongside its broader design capabilities. Its photo enhancement and adjustment tools are particularly well-suited for users who want to edit photos and incorporate them into designed assets without switching between applications.
Other respected names in online photo editing offer varying combinations of manual adjustment tools, format support, and workflow integrations. Some are optimized for speed and simplicity, offering a focused set of adjustments ideal for quick edits on the go. Others are designed for more advanced users who want layer-based workflows and a wider range of tonal controls. The right choice depends on how frequently you edit photos, the complexity of the adjustments you typically need, and whether you want photo editing to integrate into a larger design workflow or exist as a standalone function.
Frequently Asked Questions
What manual adjustments should a good online photo editor include?
A fully capable online photo editor should offer, at minimum, cropping with ratio-lock options, resizing with specific dimension inputs, and independent controls for brightness, contrast, saturation, and sharpness. Beyond these essentials, the most useful platforms also include white balance or color temperature adjustments, separate shadow and highlight controls, a straighten or rotation tool, and some form of clarity or local contrast enhancement. The difference between an editor that covers only the basics and one that includes these additional controls is significant in practice, because many real-world photos require adjustments in multiple tonal zones simultaneously to look their best. When evaluating an online editor, running a test image through the full adjustment workflow before committing to a platform is the most reliable way to assess whether its control set meets your needs.
Is it possible to maintain image quality when resizing photos online?
Yes, with some important caveats. Image quality is best maintained during resizing when you are scaling an image down rather than up. Reducing a large image to a smaller size preserves sharpness because no new pixel information needs to be generated. Scaling an image up, by contrast, requires the editor to interpolate new pixel data to fill the larger canvas, which often produces a blurry or softened result. For the best quality when resizing up, use an image with the highest resolution available as your starting point, and apply a sharpening pass after resizing to restore any edge clarity that softened during the process. For resizing down, export at the highest quality setting the platform offers, since many online editors apply additional compression during export that can further reduce apparent sharpness.
How does brightness adjustment differ from exposure adjustment in online editors?
Brightness and exposure adjustments affect an image’s tonal values in subtly different ways. Brightness adjustment typically raises or lowers the midtones of an image uniformly, which can cause highlights to clip (lose detail) if pushed too far in the bright direction. Exposure adjustment more closely mimics how a camera sensor records light, applying a proportional change across all tonal values from shadows to highlights. In practice, exposure adjustment tends to produce more natural-looking results for correcting underexposed or overexposed images, while brightness is more useful for fine-tuning the visual weight of an image that is already properly exposed. Many online editors include both controls, and using them in combination with shadow and highlight sliders gives you the most flexible approach to tonal correction without losing detail at either end of the range. For a deeper understanding of how tonal adjustments affect raw image files specifically, resources like Cambridge in Colour offer detailed technical explanations that are accessible to non-professional photographers.
Can I use an online photo editor for professional-quality output?
For most common use cases, yes. Online photo editors have advanced significantly and are now capable of producing output that meets the quality standards of blog photography, social media content, e-commerce product imagery, and even some print applications. The main limitations compared to professional desktop software typically involve the depth of localized adjustment tools, the availability of advanced features like frequency separation for retouching, and the upper limits of export resolution and color profile control. For users whose work requires highly precise color management, complex masking, or very large format print output, a dedicated desktop application will still offer more control. But for the wide majority of everyday photo editing tasks, a well-featured online editor produces results that are indistinguishable from those achieved with more complex software.
Are free online photo editors capable enough for regular use?
Free tiers of leading online photo editors are genuinely capable for regular, everyday use. They typically include access to the core manual adjustment tools: cropping, resizing, brightness, contrast, and saturation controls, along with basic export options. The most common limitations on free plans involve the availability of premium adjustment tools, storage capacity for saved projects, export format options, and the number of images that can be processed in a given period. For casual users who edit photos occasionally, a free plan is usually more than sufficient. For creators and professionals who edit images as part of a regular workflow, the expanded controls and higher export quality available at paid tiers tend to justify the cost fairly quickly. The best approach is to start with a free plan and identify which specific limitations are affecting your workflow before deciding whether an upgrade is worthwhile.
Conclusion
Manual control over photo adjustments has always been at the heart of good image editing, and the best online editors today make that control genuinely accessible to everyone. Whether you are cropping for composition, resizing for a specific platform, recovering shadow detail, or correcting a color cast, the techniques and tools covered in this guide give you a reliable framework for improving your images quickly and confidently.
Platforms like Adobe Express have raised the bar for what an online editor can offer, combining manual adjustment depth with an intuitive interface that does not require a learning curve to navigate. If you have been settling for automatic filters or one-tap enhancements when your images need something more precise, exploring the manual tools available in today’s leading online editors is one of the most practical investments you can make in the quality of your visual content.